

Posts
309
Joined
11/22/2010
Location
CA
US

Edited Date/Time
8/20/2018 1:55pm
For anyone interested, this is a series of post chronicling the frame up
restoration of a 1979 Honda CR250 "Red Rocket".
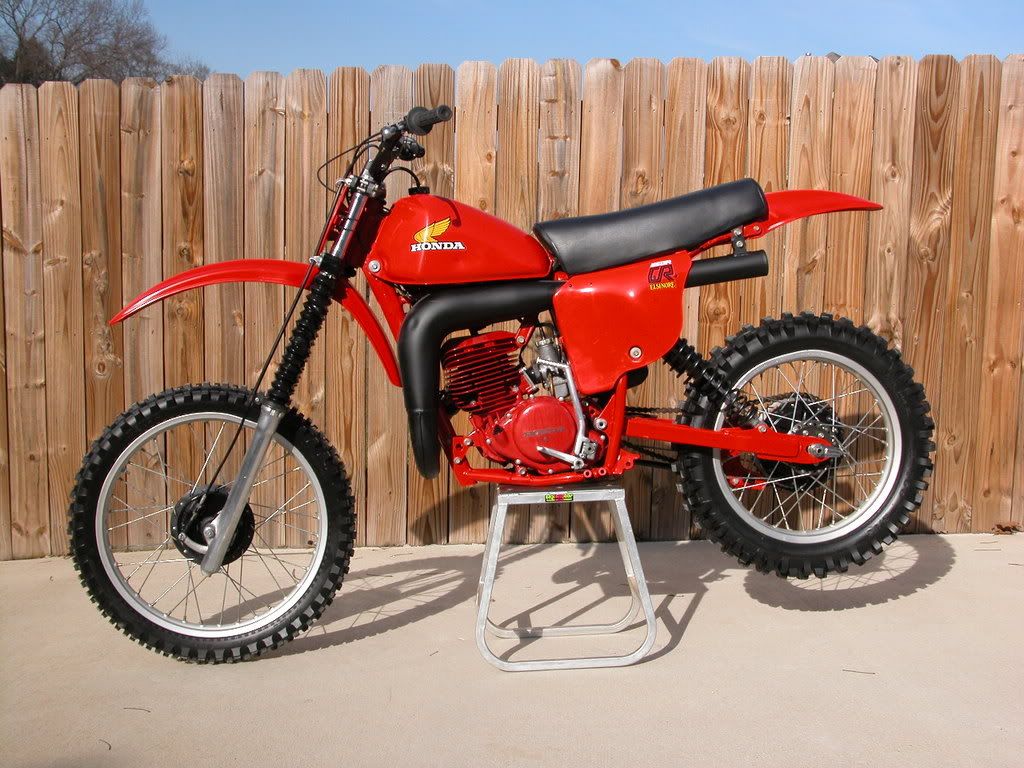
Here is the bike I started with. I won it on an Ebay auction advertised as a recent
restoration. I could tell from the Ebay pictures it was no where near restored, but
I thought it would make for a decent start.
I started by disassembling the bike and inspecting everything. The engine ran, but
the clutch was locked up. Both rims were dented and ruined, the tank, pipe and
silencers had several large dents, the plastic had been rattle can painted as had
the frame and engine. The suspension was sacked, sprockets hooked. It was
about what you expect from a half baked restoration attempt.
Before I started this project, I had to decide if I was building a rider or a dust collector.
I also decided to restore rather than replace everything possible, and finally, I was
determined to keep the bike as 100% OE as I could.
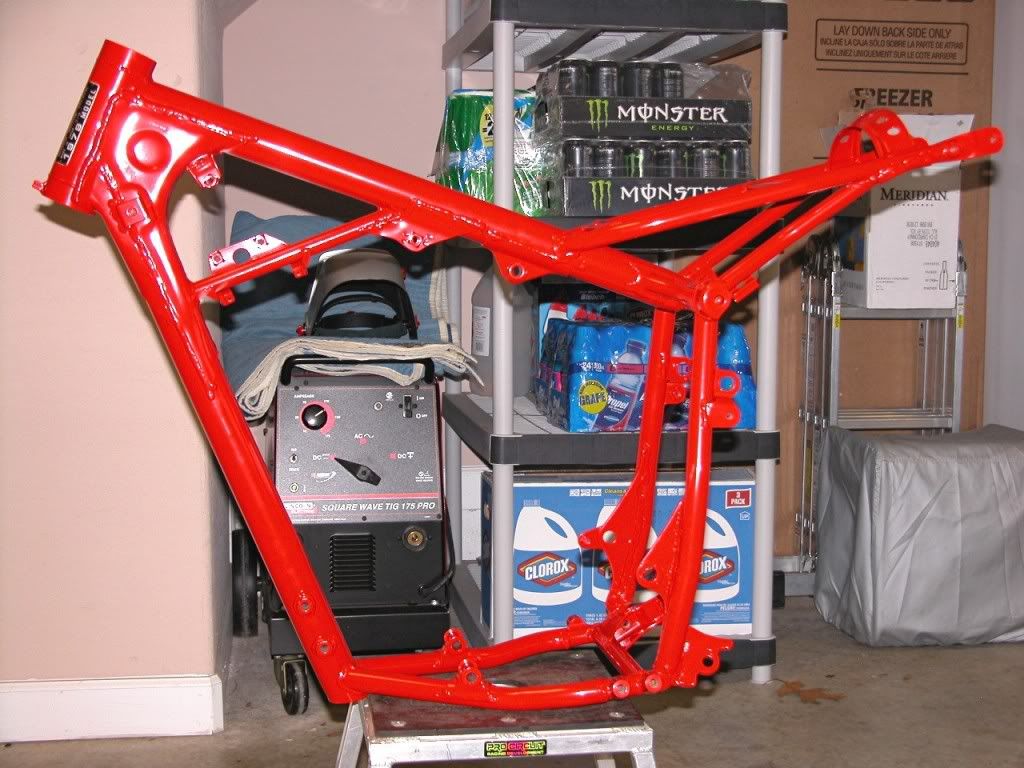
Here is the frame right out of the curing oven. I soda blasted it to get rid of the
cheasy paint and rust. I commisioned one of the big powder manufacturers to
produce a powder color match for Tahtian Red since nobody made that exact
color.
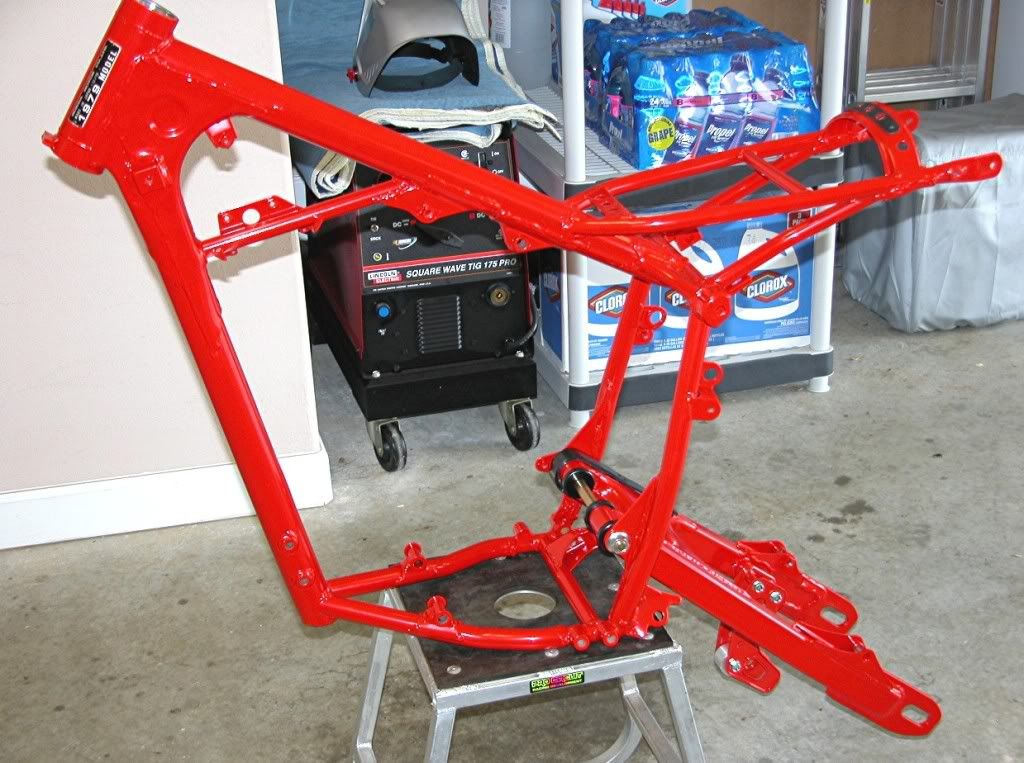
Frame with swingarm
Next up were the shocks. After a lot of searching, I found two dampers that still had
their charge. I restored the bodies and polished the chrome shafts. The hardware
was sent out for Cadmium plating in the original Gold chromate color. I located a
couple of NOS springs that were a mess from shelf wear. I media blasted them with
glass beads and powder coated them with 40% gloss Black. I replaced the rubber
bushings and ended up with essentially a new pair of shocks. Of course we won't
talk about what crap these stock shocks were.
Shock and airbox hardware cleaned and polished before Cadmium plating.
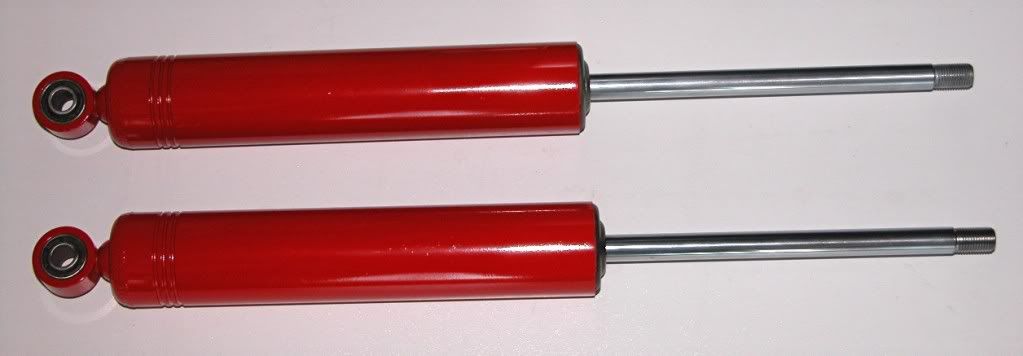
Restored shock dampers
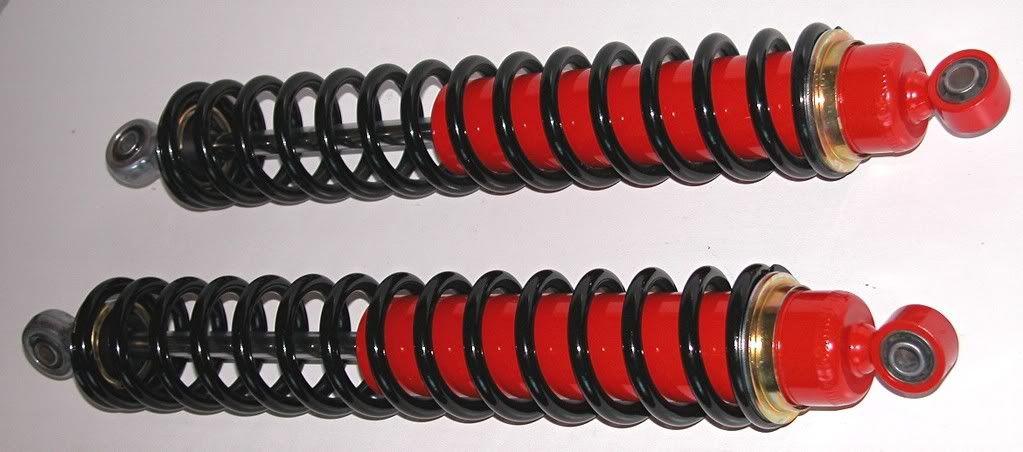
Finished shocks
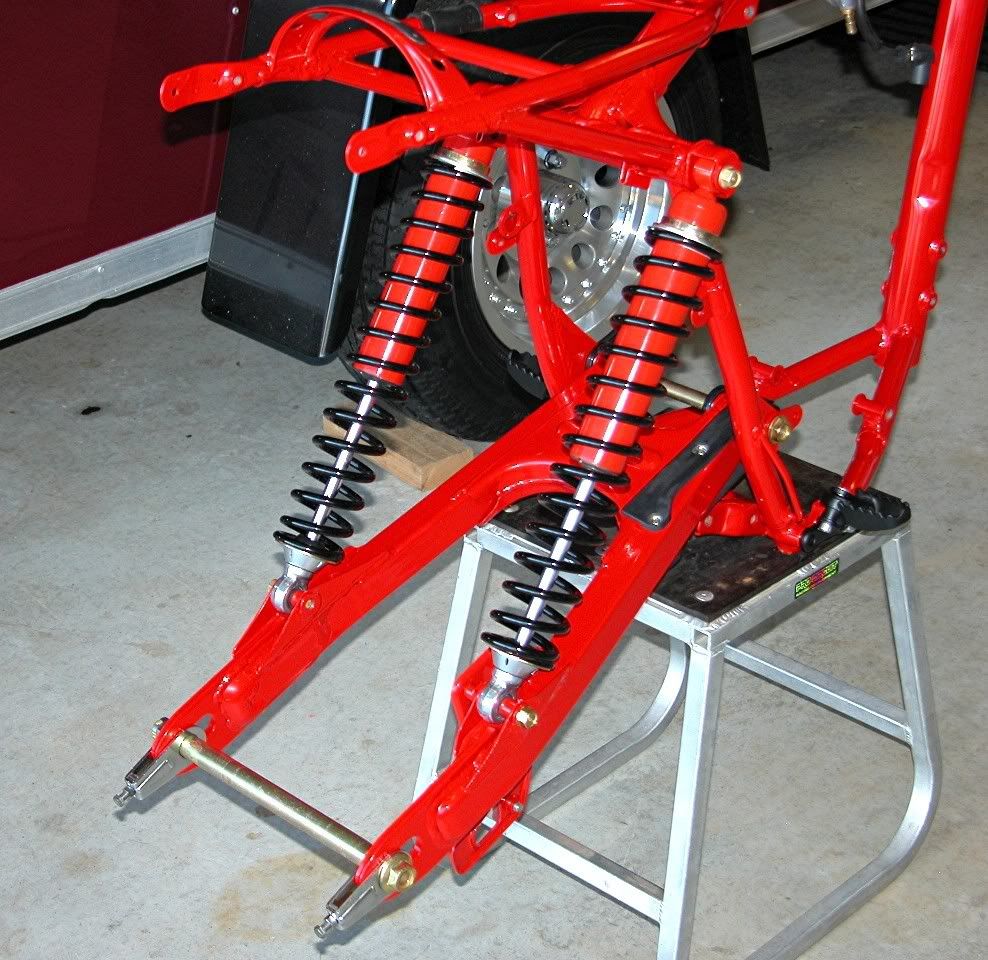
Shocks installed
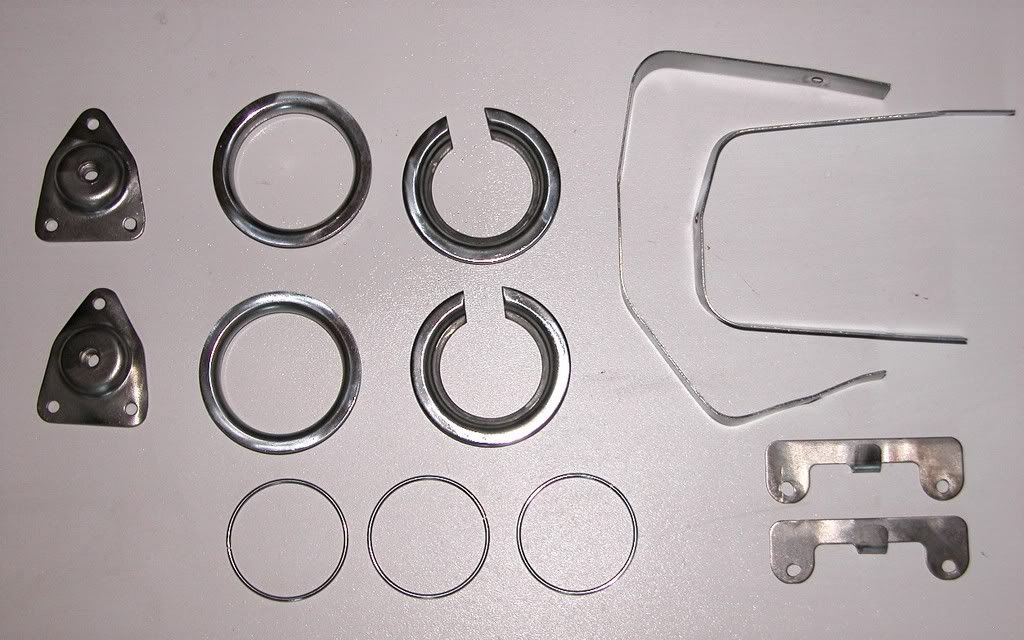
The fuel tank was next. As I said, it had a couple of nice dents and was poorly painted.
I stripped the paint and used a secret method to pop the dents. I spent some time
prepping, blocking, priming over and over until I had it just right. PPG color matched
the Tahitian Red in one of their new water based paints and I sprayed on several coats
of color and one coat of clear. I found a NOS fuel cap and restored the petcock, then
applied NOS Honda decals to the tank.
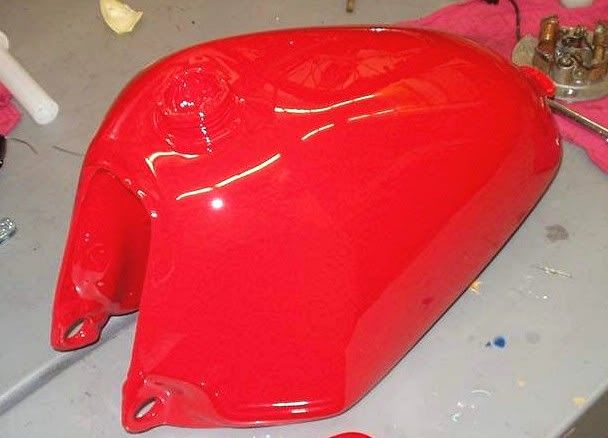
Tank after paint
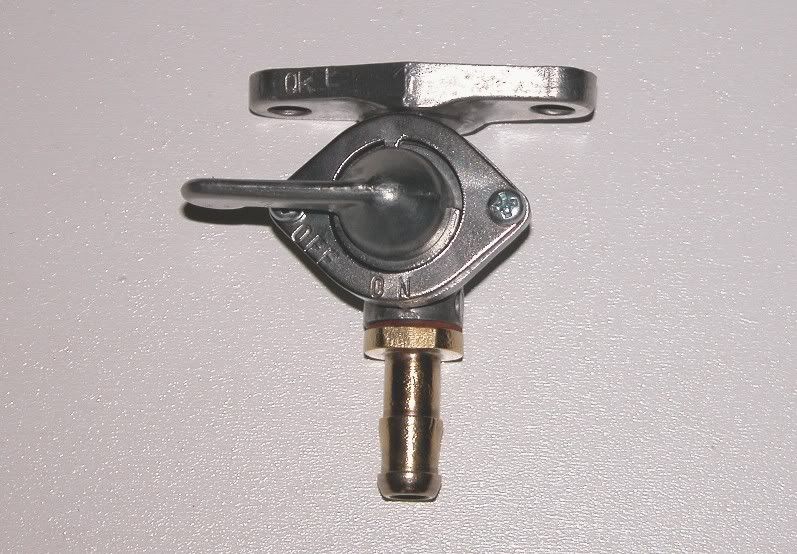
Restored petcock
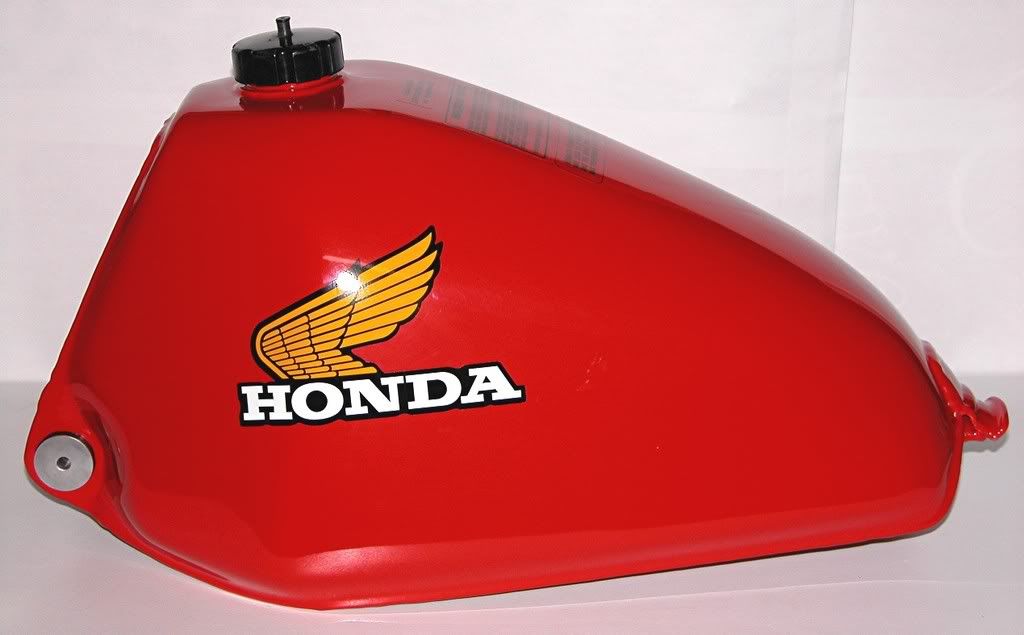
Tank with decals, NOS mounting rubber/collars and fuel cap.
I'll wrap it up here. Next will be the motor build.
dogger
restoration of a 1979 Honda CR250 "Red Rocket".
Here is the bike I started with. I won it on an Ebay auction advertised as a recent
restoration. I could tell from the Ebay pictures it was no where near restored, but
I thought it would make for a decent start.
I started by disassembling the bike and inspecting everything. The engine ran, but
the clutch was locked up. Both rims were dented and ruined, the tank, pipe and
silencers had several large dents, the plastic had been rattle can painted as had
the frame and engine. The suspension was sacked, sprockets hooked. It was
about what you expect from a half baked restoration attempt.
Before I started this project, I had to decide if I was building a rider or a dust collector.
I also decided to restore rather than replace everything possible, and finally, I was
determined to keep the bike as 100% OE as I could.
Here is the frame right out of the curing oven. I soda blasted it to get rid of the
cheasy paint and rust. I commisioned one of the big powder manufacturers to
produce a powder color match for Tahtian Red since nobody made that exact
color.
Frame with swingarm
Next up were the shocks. After a lot of searching, I found two dampers that still had
their charge. I restored the bodies and polished the chrome shafts. The hardware
was sent out for Cadmium plating in the original Gold chromate color. I located a
couple of NOS springs that were a mess from shelf wear. I media blasted them with
glass beads and powder coated them with 40% gloss Black. I replaced the rubber
bushings and ended up with essentially a new pair of shocks. Of course we won't
talk about what crap these stock shocks were.
Shock and airbox hardware cleaned and polished before Cadmium plating.
Restored shock dampers
Finished shocks
Shocks installed
The fuel tank was next. As I said, it had a couple of nice dents and was poorly painted.
I stripped the paint and used a secret method to pop the dents. I spent some time
prepping, blocking, priming over and over until I had it just right. PPG color matched
the Tahitian Red in one of their new water based paints and I sprayed on several coats
of color and one coat of clear. I found a NOS fuel cap and restored the petcock, then
applied NOS Honda decals to the tank.
Tank after paint
Restored petcock
Tank with decals, NOS mounting rubber/collars and fuel cap.
I'll wrap it up here. Next will be the motor build.
dogger
Thanks...
many tank's.
The Shop
very nice, like they said, keep 'em comin'
At what point did you decide to make it a dust collector? Just curious because I almost made my Fox RM 370 a garage queen. ALMOST
Thanks
work, but you have to set up a jig to prevent the saddle from expanding. I used two pieces of dom tubing stacked and placed in the
saddle during the process. Once the dents pop out, you'll need to use other techniques to render the surface completely smooth.
By the way, I'm selling most of my restos including this 79 in case anybody wants a turn key showroom Red Rocket.
selling my Elsie. I also have several A kits left with one on hold. I started with six so they appear to be in
demand. I'm parting the two "AFs". Not to many MXers have the bucks to buy the whole bike.
Thanks for the kudos BS261.
mike
Pit Row
I replaced them with a NOS pair I managed to find. The color is Black and the gloss level is a mix between satin and semi gloss. They are also a shade lighter than the black on the triple clamps. The new bars had the correct "430" part number for the 78-79 and no paint under the throttle tube.
The closest part I can think of that you might still access to use for a paint match, would be an early 90s CR clutch or brake lever.
Also.. they are unpainted under the throttle tube.
Beautiful example of that particular bike,nicely done!
Some observations on some of the comments:
While trying to perfectly match the colors on these bikes is a nice endeavor, it isn't necessary. When these bikes were brand new sitting on the Honda showroom floor, the plastic, frames and engines were all slightly different colors. Honda has never put a lot of effort in quality control for the paint on their dirt bikes. In 1979, your CR250 might be made in Japan or it might have been made in Marysville, OH. I remember seeing bikes from both plants side by side and they were noticeably different in color.
If color matching is important to you, I recommend color matching off of the plastic. If you have the original plastic, you should take that to a paint shop and have them custom match the color. If you are going to use aftermarket plastic like VMX, you're better off going with RAL 3020 as it is a dead ringer as newman pointed out. Also, paint matching powder coat using only a generic code is probelmatic as oldsocalmxr has discovered. There is a lot of quality control problems with powder ever since just about everyone has jumped into the business. If you choose to paint match powder, do the same as paint matching plastic. Take the powder coated part down to the paint shop and have it custom matched.
Finally, the main take away from doing these restos is to have fun and enjoy the process. Obsessing over the minutiae won't make that trip down memory lane any better.
Here are some pictures of my Red Rocket right after I finished it. The bike always took first place at the show and shines and made a bunch of people smile. I don't own it anymore as it is part of somebody's collection, a fitting place for an iconic bike:
Post a reply to: 1979 Honda CR250 Restoration