

Posts
160
Joined
11/16/2014
Location
AU

Edited Date/Time
12/27/2017 5:20pm
Hi Folks,
I've enjoyed reading everyones builds and thought I'd run through mine which took over 2 years to get to this stage, in fact, it has taken up so much of my time I'm reluctant to get it dirty! Enjoyed every minute though
Day of arrival
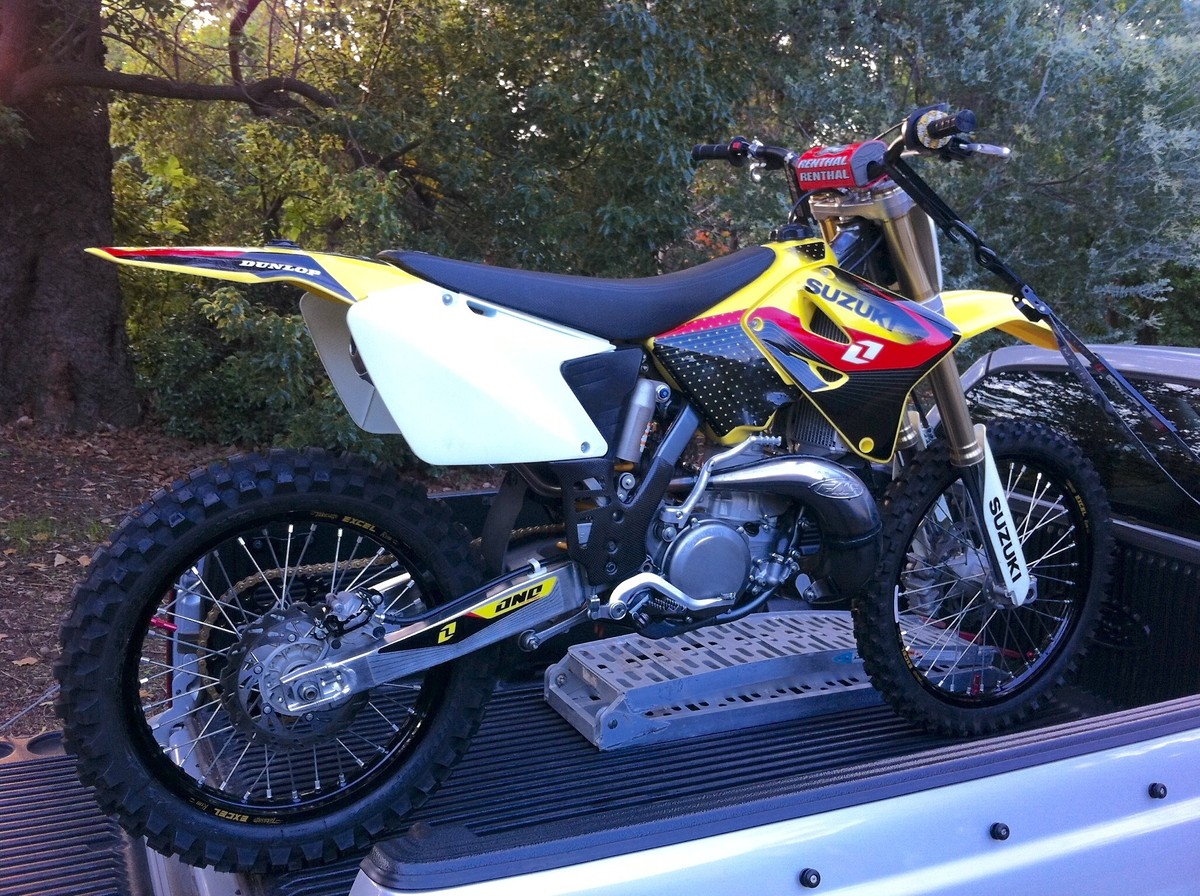
In pretty good nick, 40 hours total

Went for a few rides and fell in love so decided to do what I do to most of my bikes: wheels, pipe and suspension. I was considering black rims but when I went to visit my local wheel guy he had a pair of 'Ricky Carmichael' yellow rims tucked away. "Been there for years waiting for you" he said. Well, I had to have them and I got the feeling this was just the start of an expensive journey.
I sent the suspension out to be Kashima coated with SKF seals etc, and after patiently waiting for two months I received everything back.
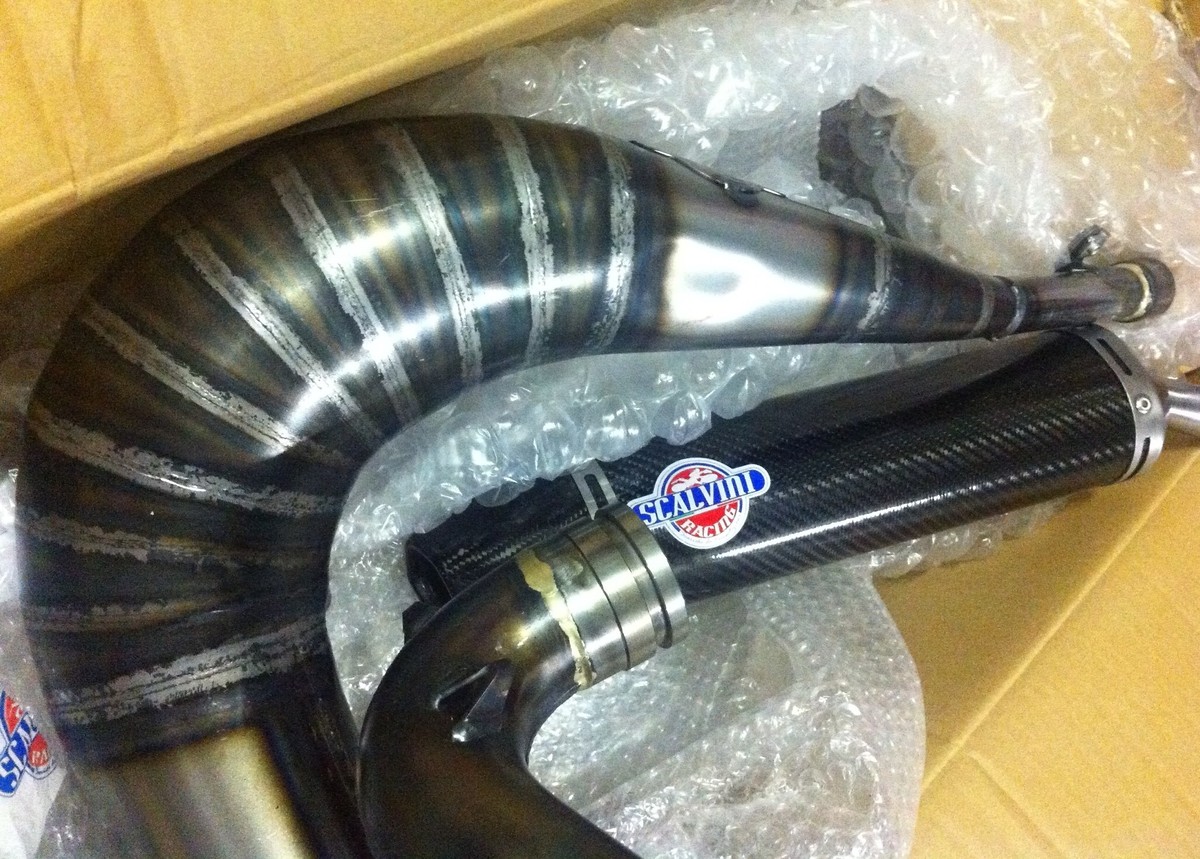
The Scalvini is just beautiful, I especially like how the expansion chamber is positioned lower than other pipes.
The nearly 4 month wait for the Talon hubs to arrive from the UK was well worth it.


Looking good, but....the forks didn't fit the clamps. They sent me RMZ forks, sigh, so I boxed them up and sent them back.

The wait was killing me so I grabbed my 150sx and took my frustration out on this berm

Two months later the forks arrive. Yesssss

Went for a ride and had so much fun I was inspired to take this bike further....way further than anything I've done before.

Stripped it down and blasted the frame.

After some bad experiences with powder coat being too thick, I elected to rattle can spray the frame myself, actually turned out nice, and no holes were filled with thick powder.
Applied clamps installed also.

Hmm, needs a bit of a tidy up with a scotch brite pad and some wd40.

The cylinder was in great condition so I just threw in a new top end and added a few goodies to get things looking the part. Cleaned up the copper head washers and used new head nuts.
I made the carbon case saver myself out of a lightspeed frame guard.
I used Pro Bolt SS bolts for most of the engine.

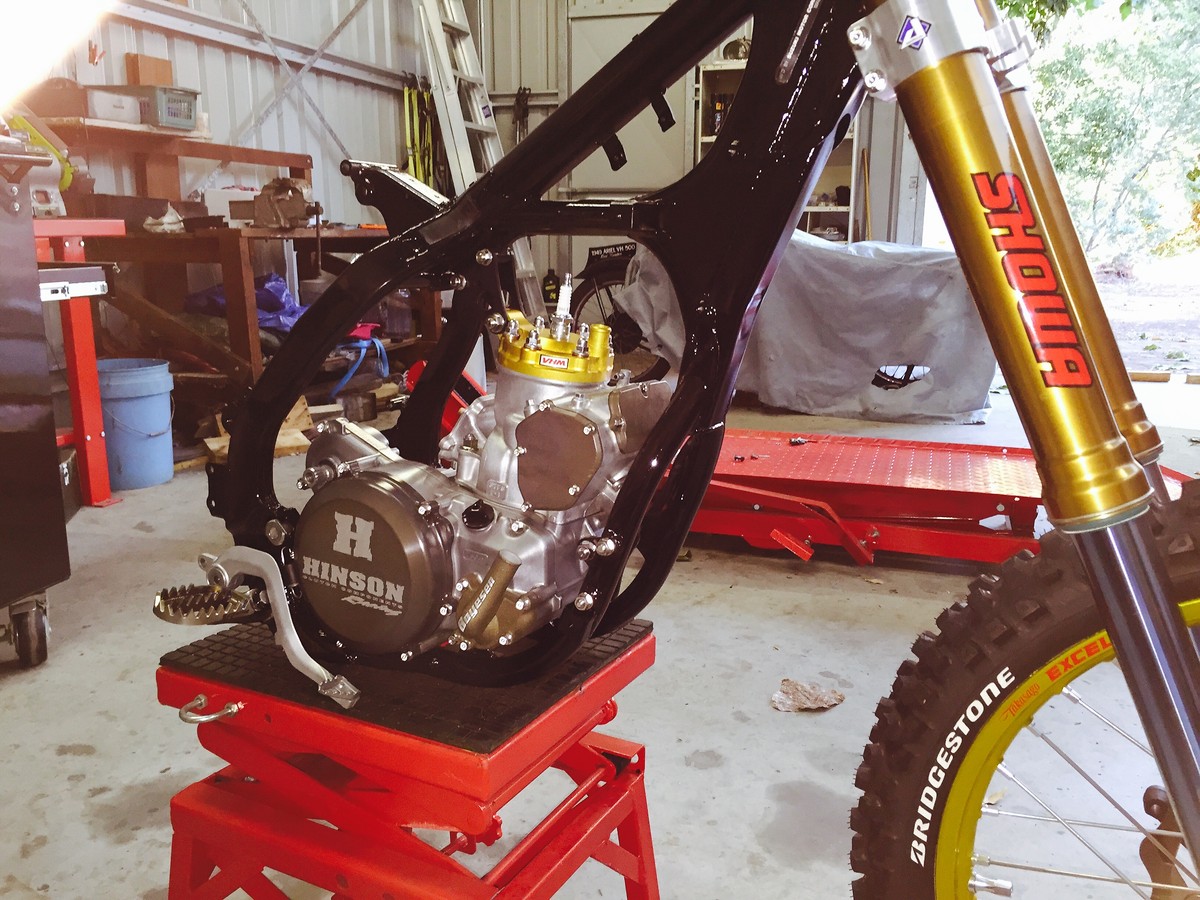
Motor in with black anodised heads stays.
I glass bead blasted the brake pedal, came up really nicely.
Also installed Raptor KTM pegs with RM springs, as I believe, others have done.
After rolling it outside into the light, it became apparent that the radiators wouldn't cut the mustard, despite spending lots of time cleaning them with oxalic acid.

New OEM radiators. Wow these are nice compared to KTM (WP) radiators.

New airbox and filter, and cut about 2 inches off the length of the silencer.
I cleaned up the subframe with this sander bit on a drill.

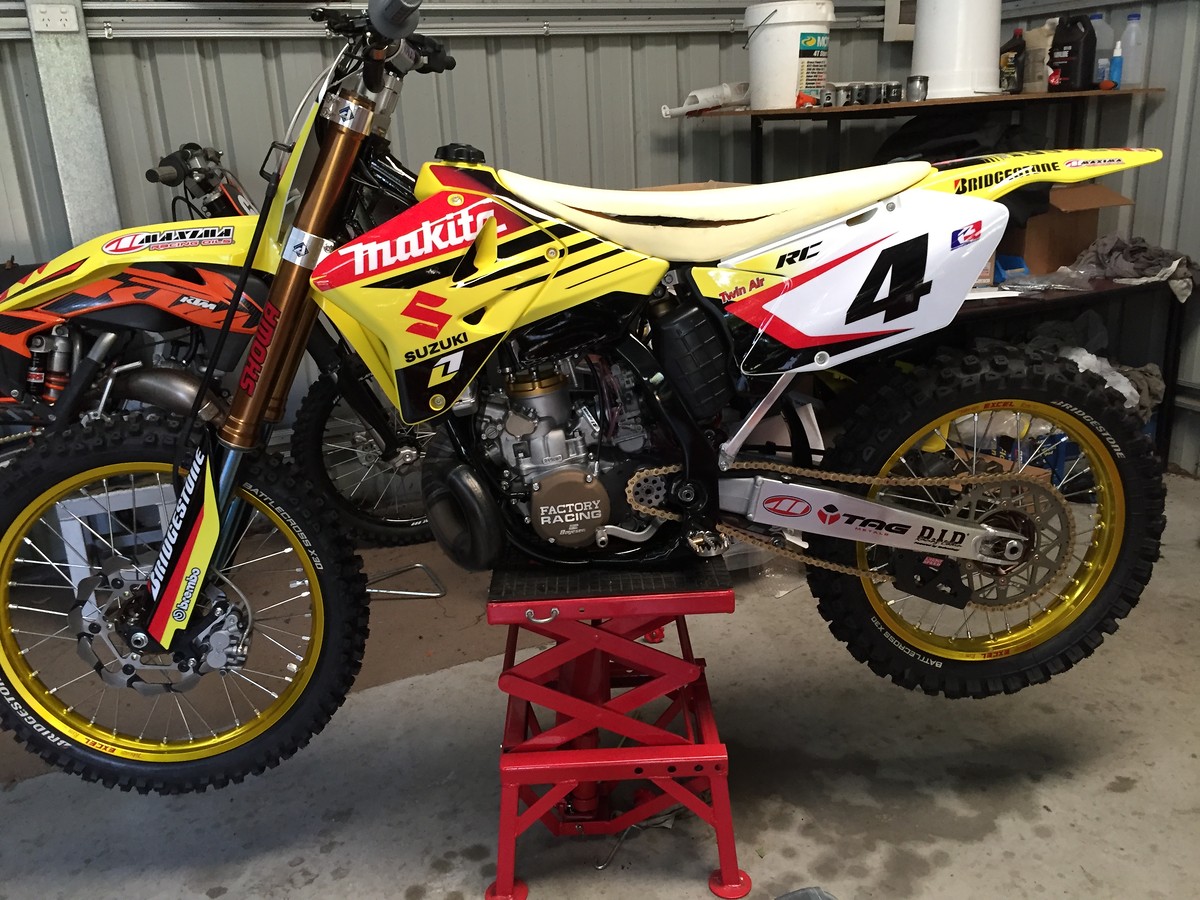
After agonising for ages over what graphics to go with I decided to go with an old favourite...Ricky's Makita bike. I drove my graphics guy half mad with getting the the kit as close as possible to the original! Thanks Ringmaster.
I ordered a new seat and made a cut along the side and squirted some expanding foam in the gap to give a flatter seat.
Stayed tuned, more to come. Cheers.
I've enjoyed reading everyones builds and thought I'd run through mine which took over 2 years to get to this stage, in fact, it has taken up so much of my time I'm reluctant to get it dirty! Enjoyed every minute though
Day of arrival
In pretty good nick, 40 hours total
Went for a few rides and fell in love so decided to do what I do to most of my bikes: wheels, pipe and suspension. I was considering black rims but when I went to visit my local wheel guy he had a pair of 'Ricky Carmichael' yellow rims tucked away. "Been there for years waiting for you" he said. Well, I had to have them and I got the feeling this was just the start of an expensive journey.
I sent the suspension out to be Kashima coated with SKF seals etc, and after patiently waiting for two months I received everything back.
The Scalvini is just beautiful, I especially like how the expansion chamber is positioned lower than other pipes.
The nearly 4 month wait for the Talon hubs to arrive from the UK was well worth it.
Looking good, but....the forks didn't fit the clamps. They sent me RMZ forks, sigh, so I boxed them up and sent them back.
The wait was killing me so I grabbed my 150sx and took my frustration out on this berm
Two months later the forks arrive. Yesssss
Went for a ride and had so much fun I was inspired to take this bike further....way further than anything I've done before.
Stripped it down and blasted the frame.
After some bad experiences with powder coat being too thick, I elected to rattle can spray the frame myself, actually turned out nice, and no holes were filled with thick powder.
Applied clamps installed also.
Hmm, needs a bit of a tidy up with a scotch brite pad and some wd40.
The cylinder was in great condition so I just threw in a new top end and added a few goodies to get things looking the part. Cleaned up the copper head washers and used new head nuts.
I made the carbon case saver myself out of a lightspeed frame guard.
I used Pro Bolt SS bolts for most of the engine.
Motor in with black anodised heads stays.
I glass bead blasted the brake pedal, came up really nicely.
Also installed Raptor KTM pegs with RM springs, as I believe, others have done.
After rolling it outside into the light, it became apparent that the radiators wouldn't cut the mustard, despite spending lots of time cleaning them with oxalic acid.
New OEM radiators. Wow these are nice compared to KTM (WP) radiators.
New airbox and filter, and cut about 2 inches off the length of the silencer.
I cleaned up the subframe with this sander bit on a drill.
After agonising for ages over what graphics to go with I decided to go with an old favourite...Ricky's Makita bike. I drove my graphics guy half mad with getting the the kit as close as possible to the original! Thanks Ringmaster.
I ordered a new seat and made a cut along the side and squirted some expanding foam in the gap to give a flatter seat.
Stayed tuned, more to come. Cheers.
Have you an hinson clutch or it's only the cover? Is it a special dome you have on the VHM?
What do you think of the bike riding wise?
It makes me want to buy an RM250!
The Shop
I had a 95 RM 250 back in the day which used to shake it's head and try to throw me off, this RM doesn't do that, it's great to ride with plenty of torque.
Your brother did a great job on your trans and you've got the Hinson basket. Very nice! Can't wait to see your blue triples installed. And well done going for original graphics, I chickened out of that route for fear of stuffing it up but you pulled it off well. And that tank!
While I was cutting threads, I noticed one of the breather hoses from the cylinder was pretty much redundant do I tapped an M6 thread and placed an aluminium bolt and got rid of the black hose. Much neater.
Titanium bolts for the rad valve
Pro Bolt Ti for the front brake caliper.
Yellow Ti bolts for the rear brake disc, boy these are lightweight!
Motostuff drilled washers.
Pro bolt make this really neat billet aluminium oil filler plug.
More black bolts and nuts for the chain guide.
For a perfect fit I need to machine down the left side to allow the axle to come through another 5mm. (Pic of the right side, RMZ blocks are thicker)
Pit Row
The silencer mount isn't the greatest, still working on that one.
Sadly there are a few wrinkles in the seat cover because it's an RMZ cover on a modified RM seat, I don't think an RM cover will fit after I raised up the middle. May need to go custom.
Because this is a new fuel tank and no fuel will be going in it, I had the graphics made without the vent holes for a neat finish.
It's a real shame that Suzuki seem to refuse to produce these fantastic bikes anymore, come on Suzuki wake up. Anyway this is how it sits today, waiting for the next update!
Looking forward to seeing what you do to your KX250
Did you make the Carbon case saver too?
Yeah cut it out from a Lightspeed frame guard that came from the previous owner. Got covered in carbon dust making that thing!
I have rather long legs and I prefer a flat seat to ride with, plus a flatter seat gives the old RM a slightly more modern look. If I do ride this bike again, I have the original tank ready to go. The expanding foam from the can I used was messy to work with! It kept on expanding for at least 20mins which was more than I thought so it was a messy job. I wish I kept more photos. If I did it again I'd probably just go with an SDG tall seat.
Post a reply to: 2008 RM250 - RC4 theme