

Posts
307
Joined
11/18/2014
Location
Nacogdoches, TX
US

Edited Date/Time
5/17/2017 7:33pm
I have been working on this project for a couple of months. Snapping pics as I go, so enjoy those as I get this thread up to date.
Here is the story. I am currently 26. My best friend and I rode 80s , his dad drove us everywhere, it was awesome in one single word. Dads – those are the best times ever, even if we are a pain in the ass and are shit heads, we will remember those days with lots of love. Thank you.
We both “Hung” up the boots as they say as soon as we turned 16 and started chasing girls around. Rediscovered the sport when I was about 24. First bike back was a 02 CR125, next bike was a YZ426, then I went all out and picked up a 2014 YZ250f. Loved that bike….but I eventually realized that I don’t need that kind of money tied up in a dirtbike to enjoy the sport.
#1

#2
#3 Sold today (7/16/15), happy to get out from under that debt! I will miss this bike though, superb power and handling
I don’t race much, but when I do it’s totally for fun, just like any track day. So yeah, when my buddies 2003 yz250 lost the airboot and sucked a ton of dirt in….I was waiting like a vulcher for him to sell it to me cheap. I think this is the perfect “long term play rider” bike. There is a decade of parts built up on the planet that will keep the costs low and easy to maintain for a long term.
Here we go!
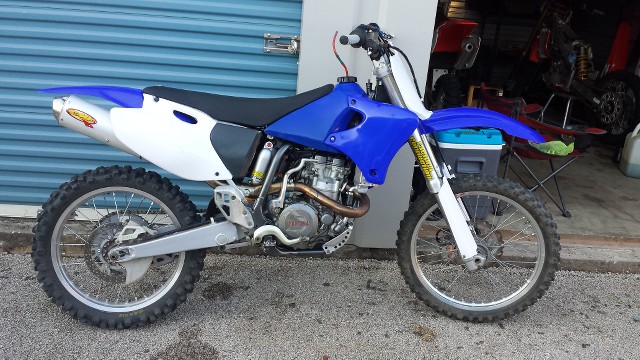
I don't have many"before" of the YZ250 but this will give you a general idea of the bike. Everything was not too bad except the motor and the wheels. Which were just horrible. Motor was toast, every spoke nipple seized.
Look at that sand paste!! Ouch


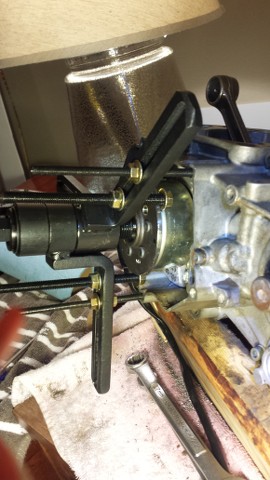
I could not find my flywheel puller so I rigged up the case splitter in a way that grabbed the flywheel. Took like 5 attempts to get right.
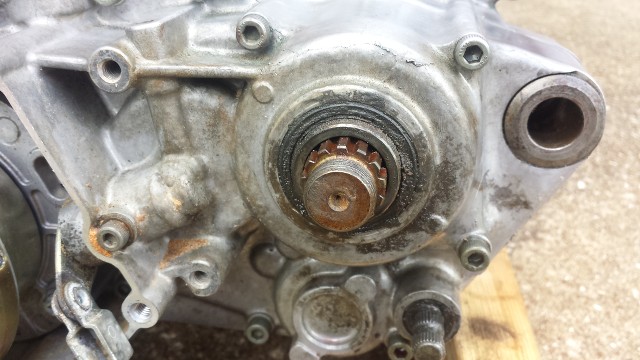
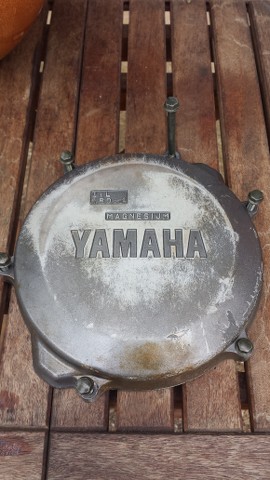
Clutch outer cover side was really nice condition, zero wear on the basket and the gears
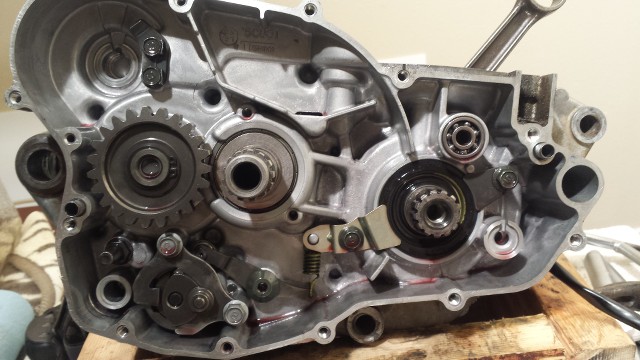
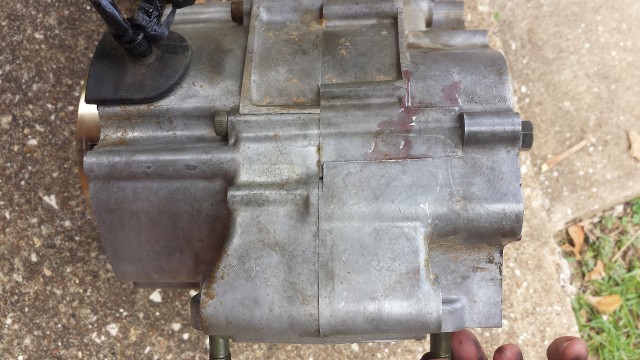
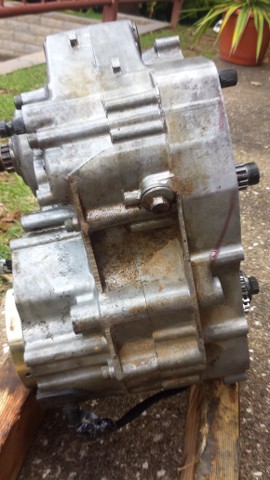
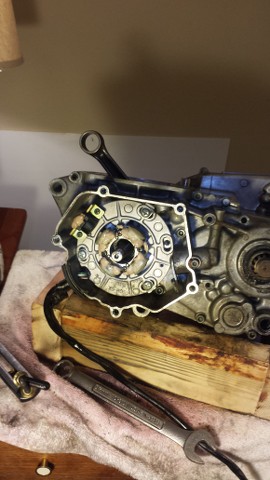
Got the cases split and trans out.
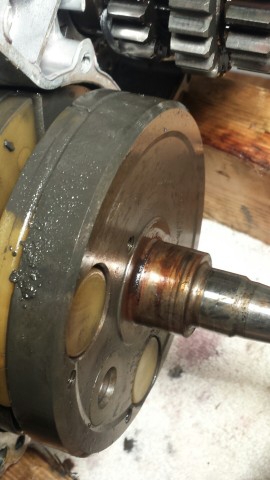
This was terrifying but I got it out no problem
Pulled every bearing and seal out of the cases and then sent the cases off to get vapor blasted. 65 bucks later and I am as happy as happy as the proverbial pig in shit. Will post these pics tommorrrow!!! stay tuned
Here is the story. I am currently 26. My best friend and I rode 80s , his dad drove us everywhere, it was awesome in one single word. Dads – those are the best times ever, even if we are a pain in the ass and are shit heads, we will remember those days with lots of love. Thank you.
We both “Hung” up the boots as they say as soon as we turned 16 and started chasing girls around. Rediscovered the sport when I was about 24. First bike back was a 02 CR125, next bike was a YZ426, then I went all out and picked up a 2014 YZ250f. Loved that bike….but I eventually realized that I don’t need that kind of money tied up in a dirtbike to enjoy the sport.
#1
#2
#3 Sold today (7/16/15), happy to get out from under that debt! I will miss this bike though, superb power and handling
I don’t race much, but when I do it’s totally for fun, just like any track day. So yeah, when my buddies 2003 yz250 lost the airboot and sucked a ton of dirt in….I was waiting like a vulcher for him to sell it to me cheap. I think this is the perfect “long term play rider” bike. There is a decade of parts built up on the planet that will keep the costs low and easy to maintain for a long term.
Here we go!
I don't have many"before" of the YZ250 but this will give you a general idea of the bike. Everything was not too bad except the motor and the wheels. Which were just horrible. Motor was toast, every spoke nipple seized.
Look at that sand paste!! Ouch
I could not find my flywheel puller so I rigged up the case splitter in a way that grabbed the flywheel. Took like 5 attempts to get right.
Clutch outer cover side was really nice condition, zero wear on the basket and the gears
Got the cases split and trans out.
This was terrifying but I got it out no problem
Pulled every bearing and seal out of the cases and then sent the cases off to get vapor blasted. 65 bucks later and I am as happy as happy as the proverbial pig in shit. Will post these pics tommorrrow!!! stay tuned
The new bikes are really, really, sweet, but at this point in my life, the fun is the experience with my riding buddies. It does not matter what bike I am on, as long as it is in good mechanical order and set up right for me.
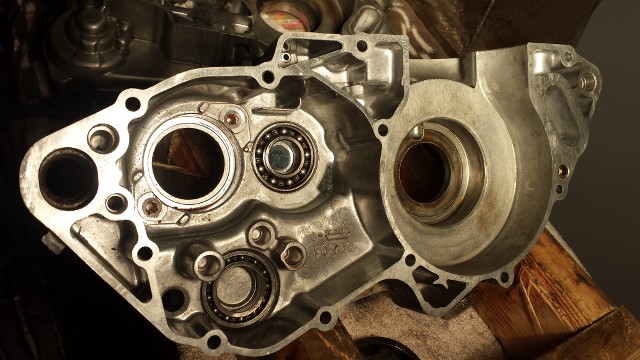
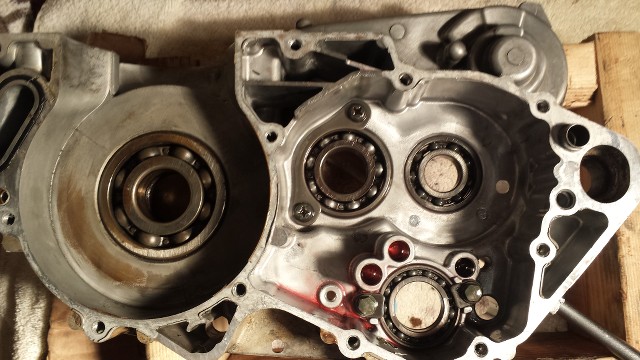
Ok, here are some pictures of the cases vapor blasted by Dan Vitaletti – Vapor Blast Solutions.
http://www.vaporblastsolutions.com/
I highly recommend him. Although I said above that I pulled all the bearings, I forgot about the blind hole ones.
I asked Dan and he pulled the blind hole bearings out for me as well as the blasting, and did a great job all around. I was nervous about the clutch shaft bearings. Those dudes, you don't want to mess with them. So I plugged them and asked Dan to be careful not to get media in them. As you can see I rubber plugged them on one side and oil soaked rag in the other. He made sure to not get anything in them. Thanks Dan!!
The Shop
Tell him R.M. in Nacogdoches sent you. I appreciated his help especially with the blind hole bearings, saved me some money on buying that puller set.
The silver frame and blasted cases look awesome!
Thanks for bringing up the silver frame. I forgot to mention it. It is definitely one of the positives on the bike. Apparently the owner before my buddy bought it had it powder coated silver. The only thing I know about painting is that I cant paint for shit. I say who ever did it for him, did one heck of a job. It is flawless.
I have been working on the wheels for a while, going back and forth trying to decide if I wanted to send them to KSR or Faster vs lacing/truing them myself. I also did not know how much $$$ I wanted to spend on them. I decided to just see if I could spruce them up myself and save that cash. The pics don't show it, but the rims are dull, especially the rear, but most important, they are straight! I wanted new shiny rims, but these should work just fine.
The entire process was really fun and rewarding. Much more than I originally thought once I decided to give it a go myselft. I took my time and enjoyed it.
Yesterday I received my wheel bearings and spoke kit so I decided to just go ahead and try to finish them up. I was nervous at first but it went really smooth and allot faster than I thought.
Before and after shot - Front Hub
Before and during - Rear Hub
Redneck Lathe
Finished with 3m 320p
These are from today
I was surprised myself, especially after getting quotes from the popular wheel builders to "turn down" the hubs. Not a cheap deal, unfortunately. So I thought WTH, I can rig something up. I did not think they were going to clean up as fast and easy as they did.... a flat file and 60grit will do some work in a quick hurry!
I am going to try wiping corrosionX on them before I ride.
Some small OEM bits and pieces that I needed for stuff all over the bike.
Tires - I went with a cheap rear to save some money and just to see what they are like. Artrax MX-Pro. I did go with a MX32 Dunlop for the front. I can live with a not so good rear tire, but I really like to trust my front.
Other items - Tusk solid front rotor, brake pads f & r. pro x steel clutch plates, rim straps, tubes, driven front sprocket.
The only other thing I need to spend money on is the rear shock. I am going to send it off for a rebuild. By the look of the bumper....it probably still has the 2003 oil still in it. Yikes!
I don't think you are supposed to be able to push down the piston with one hand....unless you are a body builder bro
Since something is already wrong, I am shipping to the suspension guy like this, maybe it will fit it inside one of those priority mail boxes.
Anyways, that's it for this weekend. I am going to kick my feet up. I still have some stuff I would like to post from a few weeks ago. Will do that during the work week. Hope Y'all have a nice rest of the weekend!
Pit Row
So I took down the main casting marks with an angle grinder/dremel untill it was pretty close (be careful not to go too far or you are done for) then I got a flat file and finished it off. Once you get really close with the flat file, you just have to feel it out by sight and by your hand.
The final step was to get a long, thick piece of all thread with nuts and washers, and get that hub chucked into a drill. Be really careful as you will have to use one hand with a piece of sand paper and one hand on the drill trigger. I started with 60 grit, 100, then 320p 3m auto body paper. This part takes a bit of set up and practice. I let the drill rest on a table, block of wood as a "bushing" for the all thread to rest on while spinning, and the hub over my lap. Right hand pressing down on drill and thumb on trigger, left hand with paper wrapped around hub and applying pressure.
Been a crazy past few days, but the end is in sight.
I have been taking care of some cats and dogs while a part of my family is out of town. Been waking up at 5:30 for the past 4 days so that I can get everyone fed, watered and shat. Then I do it all over again after work. Family is coming home today so hallelujah!
I got the shock sent off Monday. Crank and cylinder was sent last week. Not sure on the timeline for the crank and cylinder, but I bet I get the shock back this week. The suspension guy is really quick.
I will clean and re grease all the suspension bearings at some point, but I made the effort to go ahead and clean/inspect the swingarm bearings since those would be a chore to get to once the bike is back together. They looked great, everything is smooth, grease is dirty. Thankfully nothing needs to be replaced except for the seals.
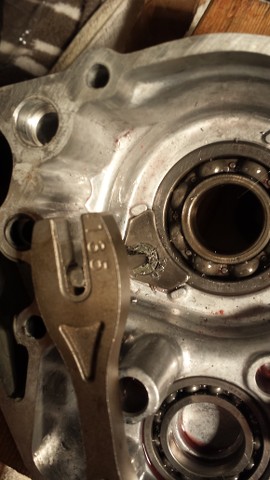
Here are some pictures of the engine case bearings install. I did cases in the oven and bearings in the freezer. I found it easier if I only left the bearings in for about 30 min. If they got too cold they instantly get a layer of frost and makes em hard to get in actually.
One of three of my last orders. Sweet!
Also the reed valve was so full of dirt it was not sealing if you try to pull air through it with your mouth (gross) but it's an easy way to check. I cleaned it up and it seals perfect now.
I have made progress on the bike, just little things day by day that add up. Will post tom.
At least this time around my buddy knows how to trade fair for animal watch.
Here is an old picture my riding buddy Brad found from way back. It must have been early 2000's. His dad surprised him with that bike. I think I remember it was just when the 85's came out instead of the 80's. I was the first person to crash it. Haha, I remember Brad was ticked off. In the background is a ttr125 that got beat to absolute shit but never let him down. I tell you though, Brad knew that bike so well he could keep up decently vs the other 80s. It was impressive to see him bottom that tank out on some of the bigger jumps. (probly why your feet are so flat bro)
Picture of me when I was getting back into the sport. Old gear, old bike, same goon riding it.
Here is the project bike as it was delivered in a rainstorm.
Getting the tires on was an adventure. I don’t like to change tires, but you know what? Now would be a good time to get some practice in. I am sure many of you know, all the little tricks make it much less difficult. I could not get the Artrax rear tire on, it was pretty stiff at room temp. I placed that cheap bastard out in the Texas sun for a couple of hours and that took the job from impossible to easy peasy. The wheels are complete. Which was a big deal as the originals were in not good shape.
Before.
After.
This entire project I have tried really hard to make sure I was not overpaying for things. I used RMATV, Motosport, and Honda Toleado East, and even Ebay for things.
What I found out was interesting. On many occasions, Yamaha OEM parts were cheaper than aftermarket stuff. For example these parts were nearly half the cost of aftermarket. Mud flap, aluminum front wheel spacers, and chain adjusters. Not to mention (I know this is debatable) but the OEM stuff generally fits better and is higher quality.
These old wheel spacers were trashed. I almost overlooked them. I don’t think my new seals would have lasted very long.
I got a screaming deal on Ebay for these new YZF footpegs. They came with all of the hardware, except for the cotter pins.
I had a gift card for RMATV so guess what!? I decided to treat the old steed to a FMF factory fatty. So excited! My first real MX bike was a old CR80 that had a PC works style pipe. I loved that bike, and keeping the pipe clean should bring back good memories.
Post a reply to: 2003 YZ250 Build - The Steely